Custom paper size

This will show you how to use the custom paper size when creating a PDF document.

Please note that you should lower your DPI setting if you create very large custom pages. Otherwise, the resulting file size will increase dramatically. You can experiment with this feature to find the right mix between file size and output resolution.

Custom Page Size Example

Let us create a small text in Notepad.

custom-paper-size-notepad

Then we print the document.

printer-dialog

Click Preferences

preferences

Go to the advanced settings

custom-pdf-page-size

Select the PostScript Custom Page Size

custom-pdf-page-size-editor

Edit the custom page size to the dimensions

custom-pdf-page-size-result

The resulting PDF should match the custom page size you selected

PDF Command

In the program folder of the PDF Printer, you will find a program named pdfcmd.exe. This is a command line utility for printing documents to PDF.

The program can handle document merge and print operations.

Usage

PDFCMD command="merge|printpdf"

Additional parameters for merge operation
-----------------------------------------
output                  File name of output PDF.
input                   Input files to merge. Multiple input files must be
                        separated by a |.
timeout (optional)      Maximum timeout in seconds for the merge
                        to finish. The default is 60 seconds.
pdfprinter (optional)   Name of PDF printer used for the operation.

Example:
PDFCMD command=merge output="C:\temp\merged.pdf" input="C:\Temp\A.pdf|C:\Temp\B.pdf|C:\Temp\C.pdf"

Additional parameters for printing PDF documents
------------------------------------------------
input                   File name of PDF document to print.
pdfprinter (optional)   Name of PDF printer used for the operation.
printer (optional)      Name of the printer that should receive the print job.
firstpage (optional)    First page to print. Default is the first page.
lastpage (optional)     Last page to print. Default is the last page.
scaletofit (optional)   Scale output to fit (yes|no). Default is yes.
bpp (optional)          Bits per pixel. Valid values are 1, 4, 8, 24 (default).
docname (optional)      Document name in printer queue.
maxdpi (optional)       Maximum DPI resolution to print.
timeout (optional)      Maximum timeout in seconds for the print
                        to finish. The default is 60 seconds.

Example:
PDFCMD command=printpdf input="C:\Temp\A.pdf"

Limitations

Since the program rely on other applications to create the print jobs, it only supports file formats where the printing programs behave well. This may cause stability issues if you run this program in a server process. Some printing programs do not handle sessions without user interaction. This means that running the job from a server process can be a bit tricky. My recommendation is that you test the usage with types of documents that you wish to print.

Global settings

The printer uses a settings file named global.ini. This file contains settings that will be forced on to all users on the machine. Normal settings are specific to the user, whereas the settings in global.ini applies to all users.

By default the global.ini is located in the folder:

C:\ProgramData\PDF Writer\Bullzip PDF Printer

The last part of the path is the actual printer name it applies to.

On different language specific versions of Windows the name ProgramData may be something different.

Migrate PDF settings to a new computer

You may find yourself in a situation where you are migrating your applications and data to a new workstation or server. The PDF printer may be part of this migration and you would like to know how to get the settings from the old machine to the new machine. In that case, this article is for you.

Install the PDF Printer

Unless you really have a good reason to install the same old version of the PDF printer as you had on the old system, I strongly recommend that you use the latest installer to install your new PDF printer. Download and install the latest available version before you try to move the configuration.

Moving the settings

The printer has a set of global settings and possibly some user specific settings to.

Global settings

In C:\ProgramData\PDF Writer\Bullzip PDF Printer you will find the global settings in a file named global.ini. You can copy this file to the same location on the new machine. These settings apply to all users on the system.

User settings

The users have their settings stored in settings.ini found in %APPDATA%\PDF Writer\Bullzip PDF Printer.

Shared option sets

Option sets shared between users are located in the folder C:\ProgramData\PDF Writer\Bullzip PDF Printer\Option Sets. The files can be copied to the new machine.

By copying the files mentioned above, you should get a PDF printer behavior, which is more or less the same as on the old system.

Transfer the License

If you have a license on your old computer, you can move it to the new computer. The license file is named license.xml. It is located it the printer’s program folder. This is typically under C:\Program Files\Bullzip\PDF Printer. Simply move the file and you are done.

Embedded fonts in merged PDF documents

When you merge PDF documents, you may see font information looking like this:

It tells you that the same font is included many times in the resulting PDF document. This will take up more space in you should try to avoid this.

The reason behind this behavior is that you are including a subset of a font every time you append a new PDF. If you use characters from the font that you didn’t already have in an included subset, it will include a new subset.

You can fix this by selecting to include the full font when you create the first PDF or the first time it is used. To do this, you should open the options dialog and select “All” in the Embed Fonts setting.

Global settings

Keep in mind that changes through the options dialog only affects the logged in user. If you want to force a setting for all uses you should add the following lines to your global settings file.

embedallfonts=yes
subsetfonts=no

PDF image quality and compression

When you create a PDF document your images are normally stored in a compressed format. The PDF creation process basically chooses between two compression types. Depending on which types of images you have in your PDF, you may prefer one over the other.

JPEG image compression

The JPEG compression is well suited for documents with photos. Images are compressed with a loss of information but it usually produces good pictures and reduces the size significantly.

FLATE image compression

In contrast to the JPEG compression the FLATE compression is lossless. The images are preserved and it does not introduce the noise pixels along sharp edges as you will find when JPEG compression is used. Therefore, this type of compression is preferred if you have images of diagrams or images containing text.

Compression selection

You can change the compression type, using different settings in the PDF configuration. If the Compress images is checked on the Document tab, then the JPEG compression is used. If you uncheck it, FLATE compression is used instead.

Spooling of PDF print jobs

Installing the PDF printer and printing PDF documents requires that the Windows Spooler service is running on the machine.

You can change the spooler settings under printer properties on the Advanced tab. The default settings for newly installed printers are shown in the screenshot below.


If you prefer other settings, you can easily change them to fit your needs. You can also bypass the spooling of your documents by selecting Print directly to the printer. Please note that this option still requires the spooler service to be running when the printer is used.

Autodesk/AutoCAD/Revit and PDF creation

When you want to create PDF documents from the Autodesk/AutoCAD/Revit products there are some parameters, you can use to optimize the PDF creation.

Depending on what you are printing or plotting the size of the resulting PDF may vary a lot. Especially drawings containing rasterized images or scanned images with a lot of noise dots will create huge print jobs and therefore large PDF files. If you are facing a size or performance issues, there are a couple of tricks that you can use.

  • Lower the DPI of the printer.
  • Change the raster graphics settings in your plotter configuration.
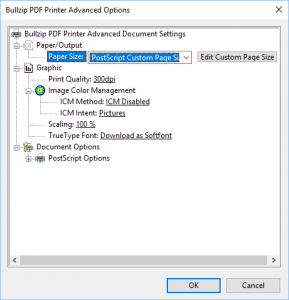
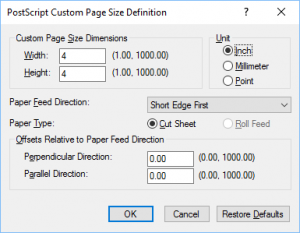
  • Reduce the paper size.

The information that goes into a PDF is a product of these settings. If you lower the DPI the 50% of what it was before then your document will typically become 4 times smaller. If you keep the DPI but doubles the paper size then the size of the print job is also approximately twice the size.

Sometimes the operating system and the printer drivers used by the PDF printer will also have an effect on size.

Here is a list of steps you can take to reduce the PDF size produced by AutoCAD.

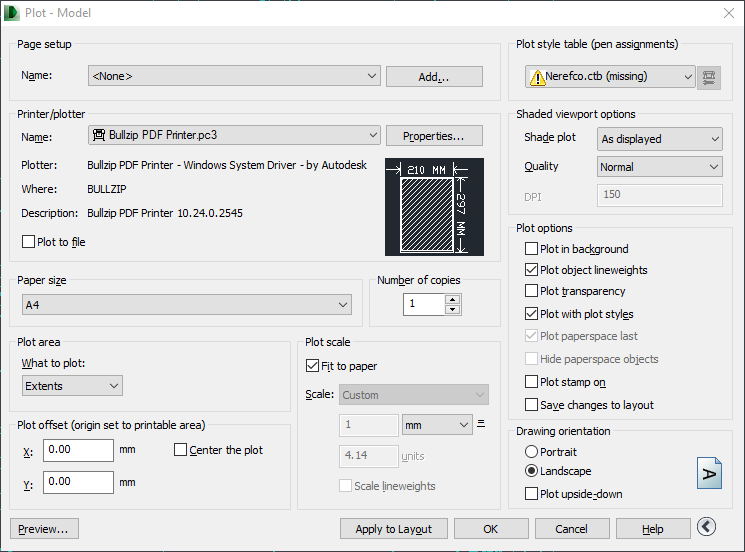
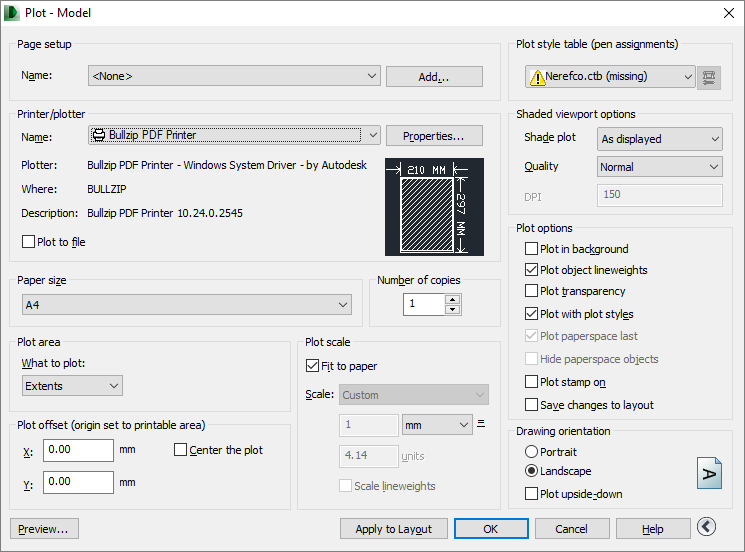
Open the print dialog

First you open the print dialog and select the Bullzip PDF Printer. Then you click the Properties button to change the printer properties.
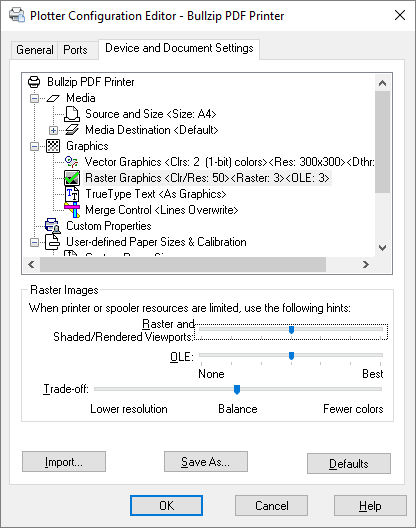

Raster Graphics

In the Plotter Configuration Editor, you can lower the raster image quality to a suitable value for your scenario. Try setting them to half the maximum value as shown here.


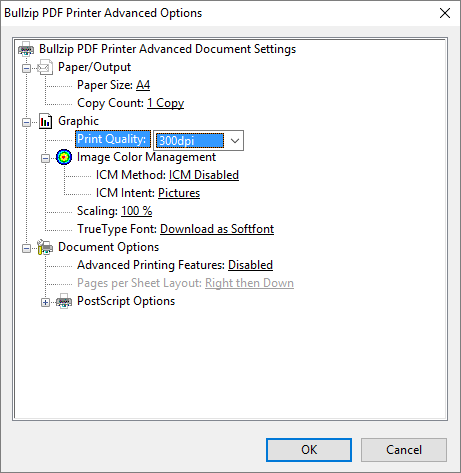
Change the DPI setting

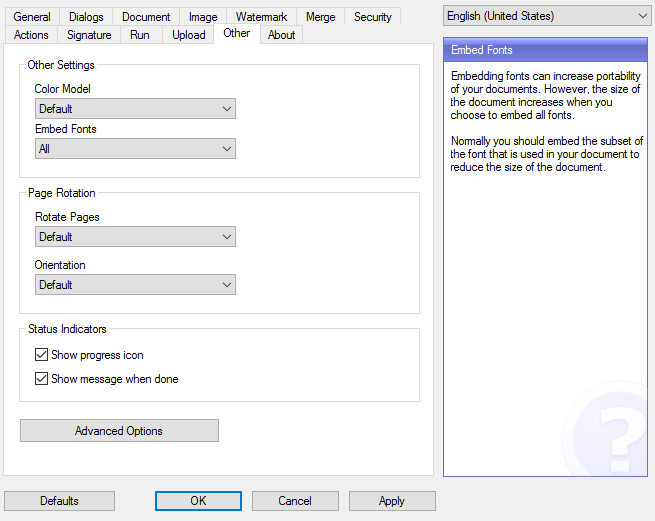
After that you can click the Custom Properties and change the DPI. Lowering the DPI will potentially reduce the quality of the output. However, it may not mean much depending on what your PDF should be used for.


Save the plotter configuration

When you have found your preferred combination of settings, you can save the plotter configuration to a file and select that the next time you want to print to PDF. In the dialog shown here, the plotter name is now my PC3 file with all the settings.

Why do I see a trial message in my PDF

The PDF printer comes with all the features available. Some features are only meant to be used by uses with a license. However, you can still try everything without a license, so that you can decide if the feature works for what you want to do. When you use a feature that is unavailable in your current license type, you will get a trial message in the bottom of the printed page. It will look something like this:

TRIAL MODE − a valid license will remove this message. See the keywords property of this PDF for more information.

You can see why the trial message was put there and determine which type of license you need. Open the PDF file properties in Adobe Reader by pressing Ctrl+D or use the menu File->Properties.


The property will open and the Keywords section will tell you the name of the feature, you are using and which type of license it belongs to.


If you already have a license and want’s to upgrade to a higher feature level then you should write to our support.