How do you set up the default save location for your PDF documents? This is a common question we get from the users of the PDF printer.
The answer is simple, and the possibilities are endless if you want to do advanced stuff.
First the simple answer
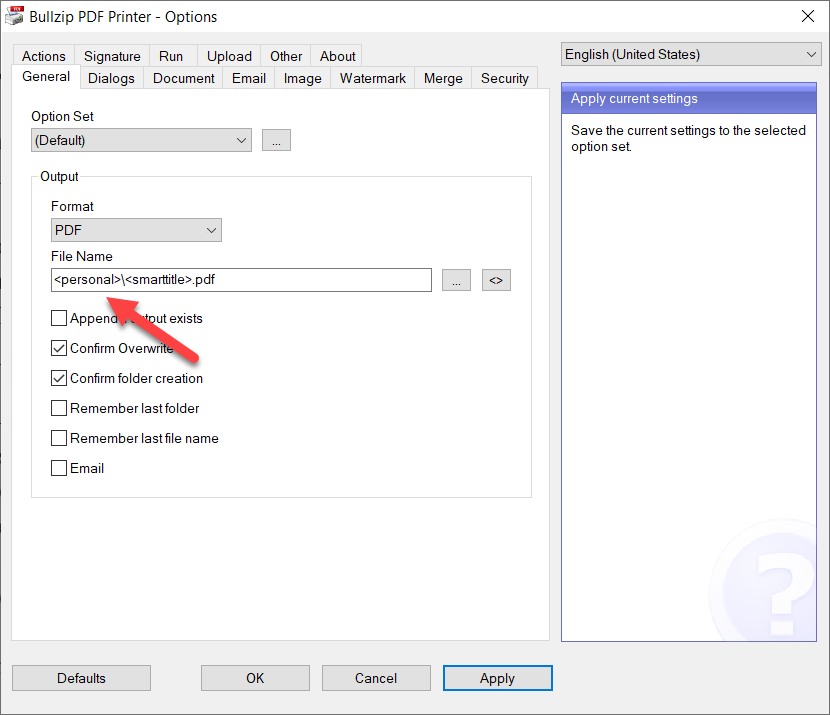
You simply open the Options dialog from the Start menu. In there you change the File Name setting to your preferred location and file name.
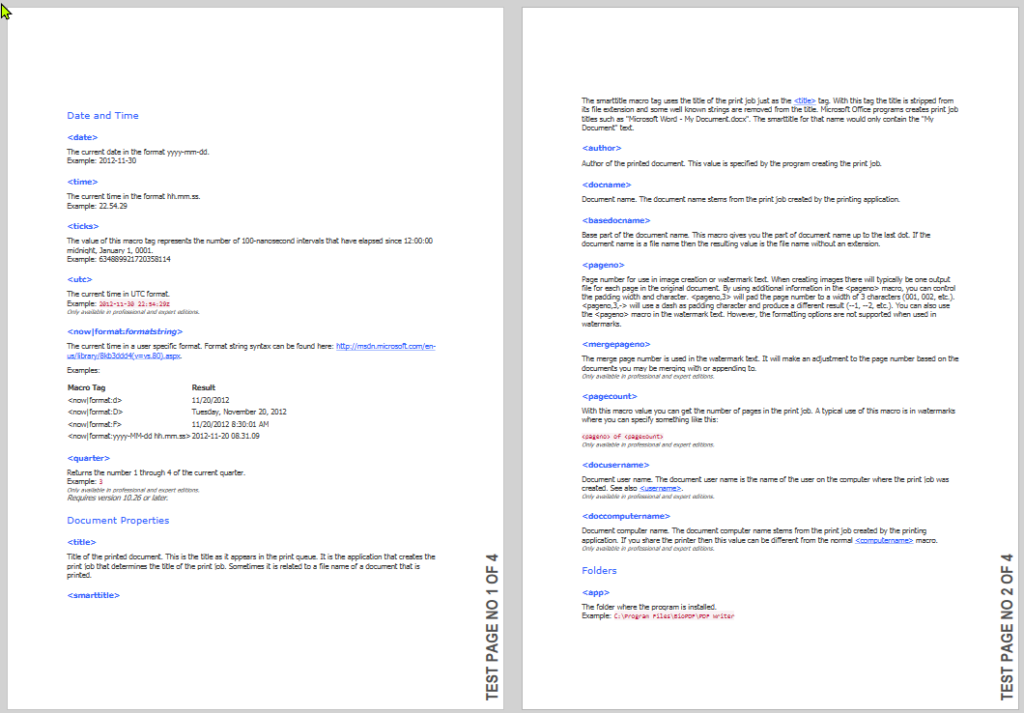
When you specify the output path, you can use Macro Tags to make the file name Macro Tags to make the file name a bit more flexible. These tags are substituted with dynamic values that may depend on the current date and time or settings on your specific machine. It can also get information from the print job or even run a script.
The most used tags include <desktop>, which points to the location of the desktop, or <personal>, which is your personal documents folder on the machine.
This is what it looks like:
Setting a default PDF file name
Now, the advanced answer
The macro tags can tap into information such as environment variables, system time, print job information, counters, unique id generation, and running scripts.
You can learn more about these macros at the BioPDF web site.
Information about the default save location is stored in the Output setting in the configuration files.
What about the name of the source document?
Users ask us why there isn’t a macro for the name and location of the source document. For example, this could be the docx file printed from Microsoft Word or a text file in Notepad.
The problem is that we need to know the source document’s file name. Unfortunately, all the printer see is a print job, which does not contain information about its origin. Instead, it has a limited set of properties set by the printing application. These include the author and the document name, but it is entirely up to the printing application to set those to something meaningful, and again, the source file name and location are not among them.
If you want the printer to generate file names automatically and have a counter or unique id as part of your file name, this will show you how.
When you open the printer options from the start menu, you can set a file name to use when a print job is created. This file name can contain tags, which are substituted with other values when printing.
Tags can give you information such as timestamps, user names, machine names, and much more. A couple of these tags have functionality for counters and unique id generators.
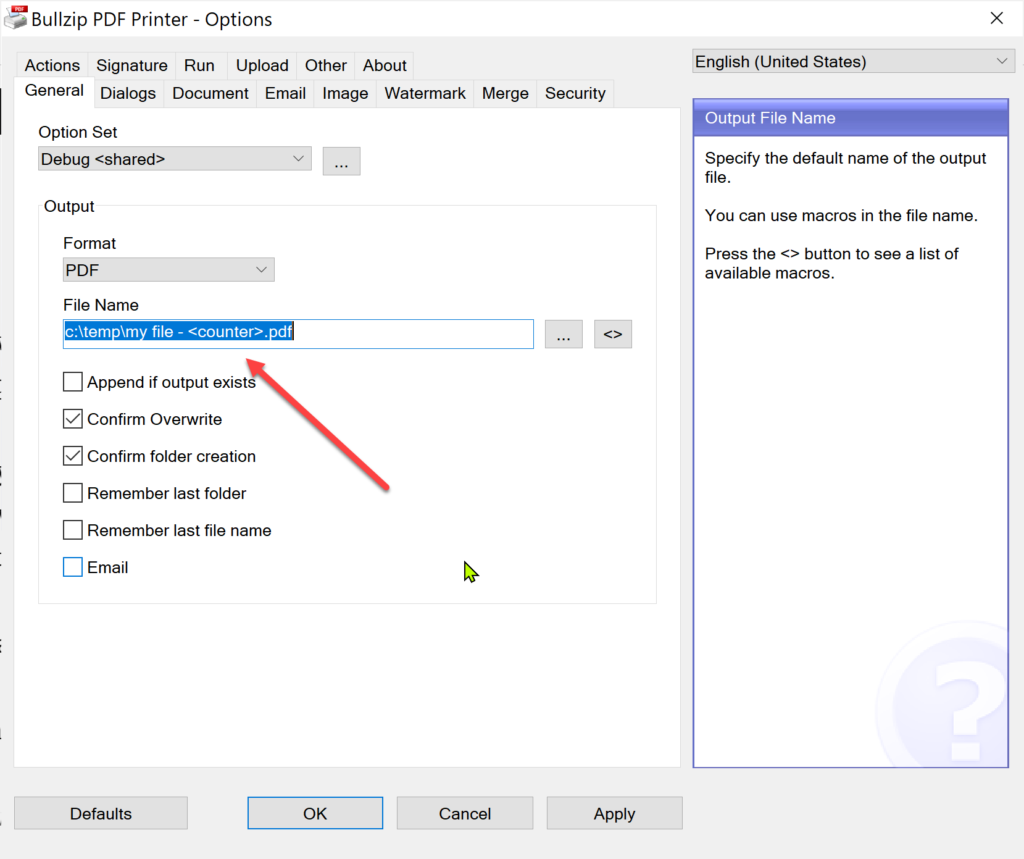
Here is an example where a counter is used.
Preset a file name with a counter
Every time the printer is used the <counter> tag will increase by one.
The list also contains a <random> and a <guid> tag for generating file names with a random part or a GUID (globally unique identifier).
You can add parameters to counter and random tags. It is also possible to have multiple counters and you can preset values for these counters if you like.
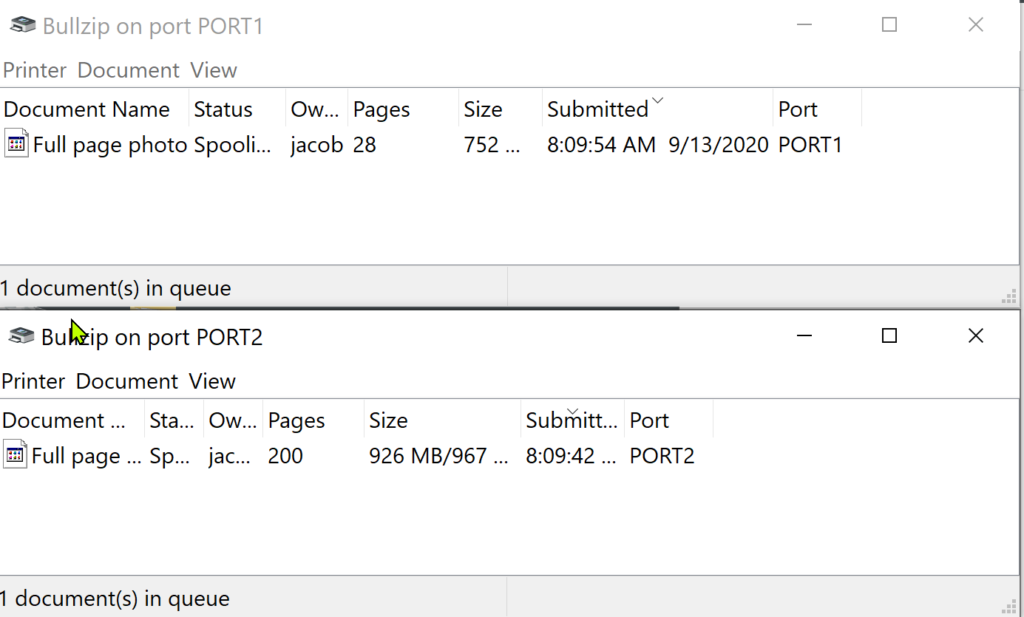
We have been asked by system administrators if it is possible to print to many PDF printers at the same time. It is now. Starting with version 11.14, you can create multiple printer ports during installation. Before this version, the limiting factor was that even if you had multiple virtual printers, they would all use the same virtual printer port. This means that one printer had to wait for the other to finish spooling the print job.
When you install a new PDF printer with a custom name using /PRINTERNAME=”My printer”, you can now add a custom port for this printer. The port is added with /PORT=”MYPORT”. This will give you a printer named My Printer connected to MYPORT. This means that the new printer can spool and print individually from other printers on the same machine.
Example of running the setup to add the new printer:
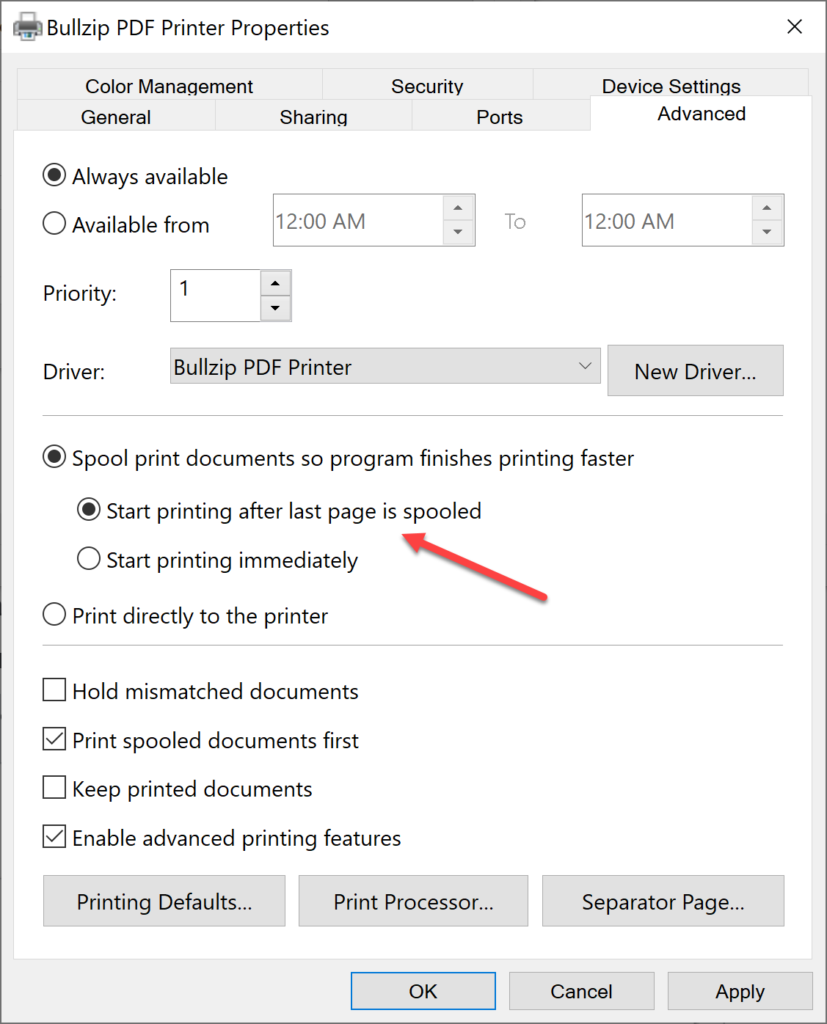
Another optimization of the printing speed is to change the spooler options to Start printing after last page is spooled. This helps if one print job is taking a long time to finish printing. Usually, the spooling is faster than the printing for the virtual printer.
Start printing after last page is spooled – Advanced Printer Options
One caveat of this option is that if you use the runonce.ini
to control the parameters of the print job, you no longer know the order of the
print jobs. This means that unless you have unique names for your print jobs
the runonce.ini files may not be used with the print jobs they were meant for.
If you can control the names of the print jobs from the
printing application, then you can use the runonce_jobname.ini file
names to match the print jobs and the configurations.
Fast PDF Printing
The fastest printing is achieved by creating a configuration for the printers that generate automatic file names and disable the printing dialogs so that printing is unattended. On top of that, you should create multiple instances of the printer with different names and individual port names. Spooler settings should be set to start printing after the last page is spooled.
Two large print jobs printing at the same time
Feedback
Please send us an email if you have feedback for this
article.
The PDF printer version 11.12 contains a fix/workaround for this problem. This means that if you see the following error when printing to PDF then you just upgrade to the newest version.
Sometimes you get unexpected results when you use a PDF document as a background.
A PDF used as a background in a merge or superimpose operation is often referred to as the letterhead, watermark, logo, or briefpapier (in German). These documents can have properties that make them unsuited for this purpose. Among the common problems are font, color model, and transparency issues.
The result of using a problematic PDF is often strange colors or strange-looking text.
Normally, you can clean the PDF by printing it to a new PDF. This process can rewrite the structure of the document so that it can be used in the merge or superimpose operation.
A method that often works is to open the PDF in Adobe Reader and print it to a Bullzip PDF Printer installed in XPS mode. The method is not bulletproof but is often a good first try.
Text that looked strange before will most likely be fixed. However, you may not be able to select and copy/paste it as text anymore. Also, colors are now likely to be close to the original but there may still be small differences.
You can play around with this process to see if you can get a better result. Here are some parameters that you can test with different values.
Try to print it from other PDF readers such as Bullzip PDF Studio or Sumatra PDF.
DPI and color models.
Print quality setting on the document tab.
It is often a combination of printing the PDF from a specific PDF viewer to a specific PDF printer that will remove the commands that are causing the problem.
Here are some PDF viewers to try:
Bullzip PDF Studio
Adobe PDF Reader
Sumatra PDF Reader
Combine that with printing to one of these PDF printers:
Bullzip PDF Printer
Bullzip PDF Printer in XPS mode
Microsoft Print to PDF
If you cannot fix the PDF yourself, then it may be an option to go back to the designer and have them try to create a PDF without transparency and special font information. It may be that they can change some settings in the PDF export that will fix the problem.
The PDF printer was originally based on converting the output from Postscript drivers to PDF. This way of doing it has served the purpose well for a long time. However, sometimes the output can convert in ways that do not serve the end purpose well.
Especially font issues have been a reason to look for alternatives to the Postscript driver technology. Postscript has built-in fonts and different strategies for embedding subsets of fonts which may not work well with software that tries to read or copy/paste the content of PDF documents.
To fix some of the Postscript related issues we have added the option to use an XPS based driver. The functionality of the XPS based approach supports fewer features but it solves some of the other issues.
You can tell the installer to add a PDF printer based on an XPS driver by adding the /XPS switch to the command line of the setup program.
The following command line is an example that shows how to add an extra PDF printer named “PDF Printer (XPS)” to your system.
The PDF Printer has a feature that will upload the created PDF file to a server. Both FTP and HTTP uploads of the PDF document are supported. This means that you can send the documents to a web server that you have created and do some processing in a cloud application.
Uploading to an FTP or SFTP server is simply a matter of setting up a server to receive the files.
HTTP and HTTPS are supported via the normal file upload protocol. It requires that you create a script on your server that will receive the uploaded file.
You can test your upload script by creating a simple “File Upload” form on a web page. The code could look something like this:
The page that receives the file can be written using any web server language. Here is an example in PHP.
$filename = basename($_FILES["file"]["name"]);
if (move_uploaded_file($_FILES["file"]["tmp_name"],
    $filename.".tmp"))
{
    // This file is copied so that IIS
    does not set itself as owner of the file.
    copy($filename.".tmp", "uploaded-".$filename);
    unlink($filename.".tmp");
    echo "The file '".$filename."' was uploaded.";
}
else
{
    echo "Error";
}
Configure the printer for upload
You can tell the printer to upload to your HTTP handler by adding these settings:
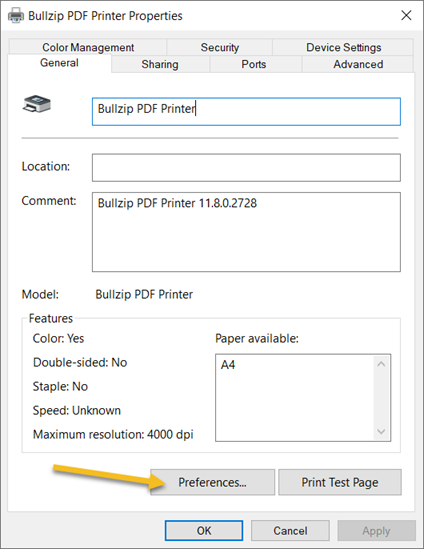
When printing, you will encounter a couple of places where you can change the printer settings. Two of these places are found in the printer’s property dialog.
On the General tab, you can click the Preferences button and change the printer settings for the currently logged in user. This means that you can change your own settings for this specific printer. The changes that you make here will not affect other users.
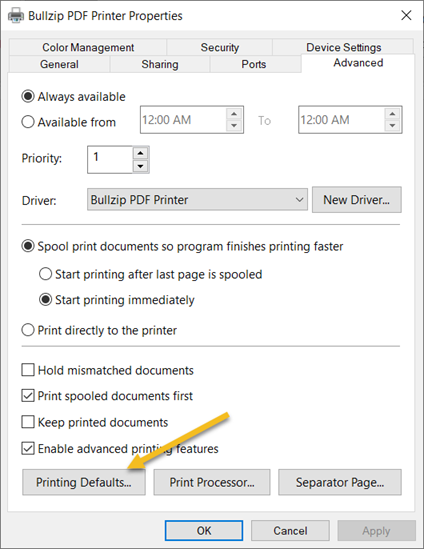
If you go to the Advanced tab and click the Printing Defaults button, then you will see a similar dialog. However, this time you are looking at the settings on a machine level. This means that when you change the settings here it will affect the users that don’t yet have their own preferences set.
New users will inherit the settings from the Printing Defaults.
Sometimes, the user’s preferences are reset by Windows. This can happen during Windows updates, reinstallation of the printer, or GPO changes. Other events may also reset the settings.